You want to enjoy some console classics
Xbox games have been ported to Windows PCs for decades, but PlayStation games making the leap to PC has traditionally been quite rare. Not so recently, though. There are many classics from various generations that have been making their way to Windows in the past few years, from Final Fantasy VII, to God of War, Horizon Zero Dawn, to The Last Of Us. Most of these are rebuilt in new engines so they can be experienced in entirely new ways.
Often, though, this means that you’ll need a powerful PC to make them look and run at their best. If you want to make The Last of Us look better than ever before, it might be time for an upgrade.
Upgrade vs. Pre-built
Once you’ve decided that it’s time to upgrade your computer, you have to decide whether you can build on what you’ve got already, or need to replace the whole thing with something new. But making that decision isn’t always easy. Just how far can you upgrade what you have? Can it get close to the performance of a modern PC? Can you save a bunch of money by only upgrading a couple of components, or would you save more long term if you start from scratch now?
In some cases, buying a brand new computer will give you far greater an uplift in performance for not too-much-more money, as well as unlocking additional features, and giving you a better upgrade path for the future.
Whether you need an upgrade or a brand new PC very much depends on what you have right now, what you want to do with whatever you upgrade to, and what kind of budget you’re working with.
Is your PC worth upgrading?
Every computer has some form of upgrade path available to it, but the question is, is it worth taking? Really old computers might have had viable upgrades at the time, but buying a second-hand processor that’s equally old and only a little bit faster is rarely a cost effective plan. Dropping in a cheap graphics card to an old office machine might work in some cases, but the power supply may not be enough for it, and you’re not giving yourself much scope for future improvements.
This article would go on forever if we listed every piece of hardware, with every potential upgrade, with a bespoke take on whether each upgrade is worth it for each person. But we can make some generalizations about what is, and isn’t worth it from an upgrade perspective
If you want more bespoke quote on whether your PC is worth upgrading, or should you just replace the whole thing, get in touch with CCL. Our PC experts will be able to break down for you exactly the kind of upgrade you should make to maximize your performance for your budget.
Here are some examples of different kinds of PCs you might already have, and whether they’re worth upgrading, or if you’re better off replacing them with a complete new build PC.
10 year-old PC
If your computer is 10 years old, whether it was a high-end gaming machine or a simple desktop for homework and answering emails, it’s probably not worth upgrading. If you’re on a super tight budget you could get some second-hand memory from an auction site and replace the hard drive with a SATA SSD – and reinstall Windows – as that will make it feel more responsive. But it won’t improve performance in modern games and applications and you’re really only prolonging the inevitable.
5-year-old PC
If your computer is five years old, there’s a little more scope for upgrading. If you don’t have an SSD as your boot drive, upgrading to an NVMe SSD or, if it doesn’t support that, a SATA SSD, would make a big difference to how responsive and snappy the PC feels. You’ll need to re-install the operating system, but that factory reset combined with an SSD upgrade can make an older PC feel like new again.
At this sort of age, too, unless your processor was bottom of the barrel when new, it’s likely good enough to handle casual gaming. If you have an older graphics card or none at all, then dropping in a compatible GPU from a newer generation can be a great way to get a few more years out of an older computer, or convert an ageing office machine into a gaming PC for the kids.
We’ll get more into the specifics about how you can and should upgrade for what reasons below, but it’s safe to say that there’s real scope for five year old PCs to be perfectly viable for upgrades – just make sure your power supply is beefy enough to handle whatever you swap in.
That said, there’s greater scope for upgrading certain PCs than others. A desktop PC with an x370 motherboard and a Ryzen 1000 CPU can be upgraded to a 5800X3D with faster DDR4 memory for a massive boost in performance. Combine it with a high-end graphics card and you can turn it into a high-end gaming machine.
In comparison, a PC with an Intel 8th generation CPU can only upgrade to 8th and 9th generation processors which you won’t be able to buy new. High-end options from that era are still expensive even now, so in that case you might be better off buying a new pre-built PC.
A modern budget build
If you have a PC from the past few years which is underpowered for what you need, there could be some serious scope for upgrading. Any AMD Ryzen PC from the past few years has the potential to upgrade to a much more powerful processor, faster memory, more and faster storage, and you can always upgrade the graphics to make it better for gaming, too. Many of Intel’s recent generation PCs are still fantastically fast, too, with lots of room for newer and higher-end CPUs.
You might need a bigger or more capable power supply for some of those items, but the potential is certainly there.
There are some cases where a brand-new PC might be worthwhile, though. If it’s a pre-build which is particularly small, has a weak power supply, or a conservative motherboard, it’s possible that you’d need to practically upgrade everything to make the most of your upgrade. In that case, you may be better off simply replacing the whole system.
Cost is everything
It doesn’t matter what kind of PC you’re starting with, if your budget doesn’t stretch to the price of a full pre-built PC, then you aren’t going to be able to get one and an upgrade is your only option. But how much do pre-built PCs cost? And how much are different components to upgrade?
If you’re deciding between an upgrade or a pre-built PC, then know that a brand new computer can cost anywhere from several hundred pounds, to several thousand. CCL Online offers entry-level home office PCs for around £450, and modest gaming PCs from around £750. For a more modern computer designed with more-demanding applications and games in mind, you’ll need to spend at least £1,000 and anywhere up to £3,000 for a very high-end system with all the bells and whistles.
If your budget doesn’t stretch that far, though, never fear. Upgrades are far more affordable and there’s plenty of scope for improving what you have, for less.
You can get a 16GB kit of fast DDR4 or DDR3 memory for under £50, and 256GB SSDs are less than £20. If your PC is ancient and just needs a little jolt and a reinstalled Windows to give it a new lease on life, these are excellent options for quick and cheap upgrades.
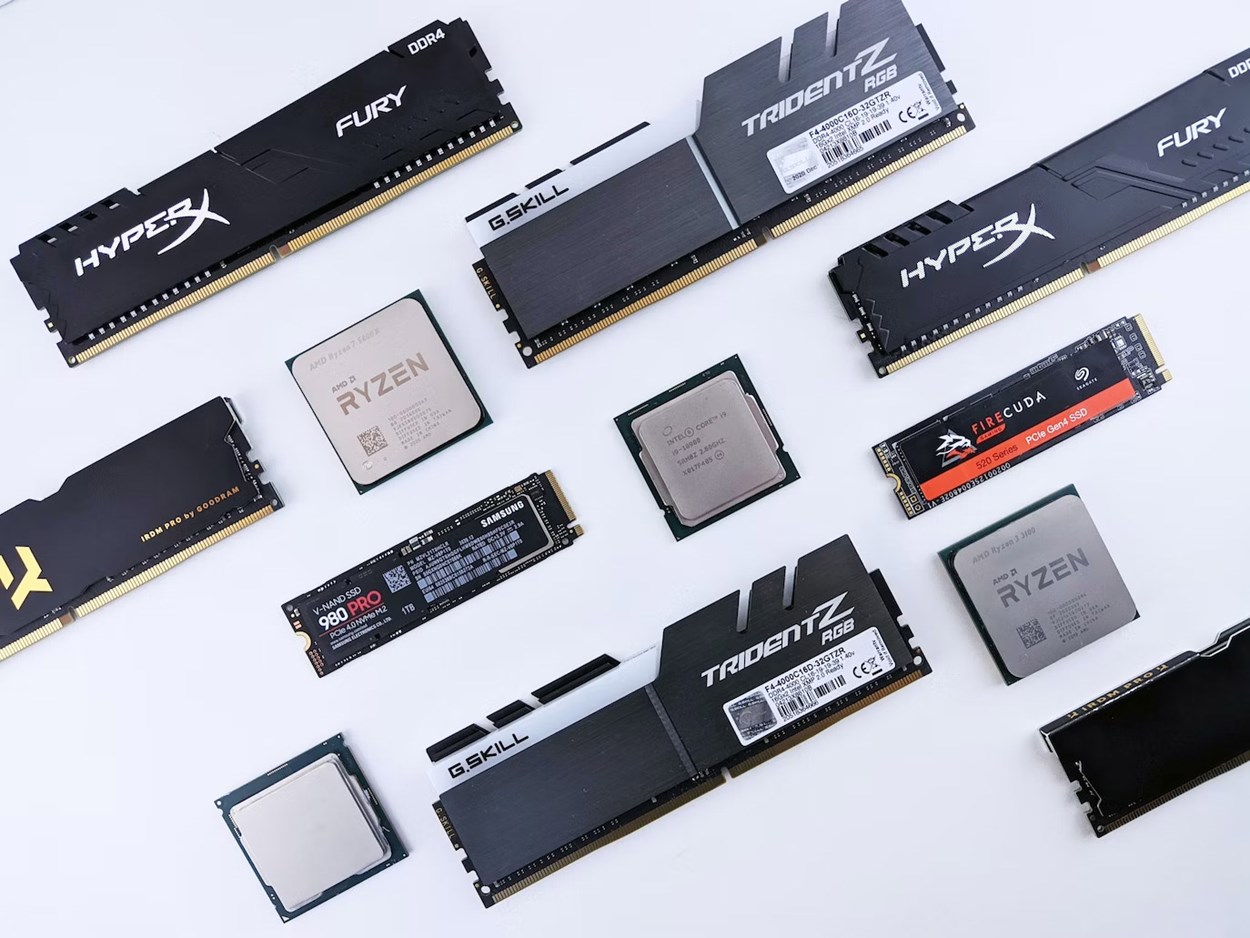
New processors can cost anywhere between £100 and £700 depending on what you’re after, but if you’re going for a big leap in performance, you might need to factor in the cost of a new motherboard too. Those cost between £100 and £500 depending on your needs (though unless you’re an extreme overclocker, you can ignore the high-end motherboards).
For graphics, the sky’s the limit on what you want to spend. If you’re dropping in a budget GPU to turn an old PC into a new gaming one, you can grab an entry level GPU for around £150, or something more modern and mid-range for around £250. Top-tier graphics cards can cost up to £2,000 a piece, though, so weigh whether your PC is ready for such an upgrade before pulling the trigger; Especially since you might need to pay for a new power supply too, which can cost between £50 and £300 depending on the model.
Most of these components are still far cheaper than buying a pre-built PC, though. So weigh your budget when deciding whether to buy a brand new computer, or make a few choice upgrades to the one you have.
What should you upgrade?
If you’re more interested in upgrading your existing PC than buying or building something new, then you have extensive options for what to upgrade from and to. To maximize your budget you want to focus your upgrades on the components that will have the biggest impact on performance, or add the specific features you want.
With that in mind, let’s take a look at a few different goals for an older computer, and what components you should look to replace or upgrade to achieve them.
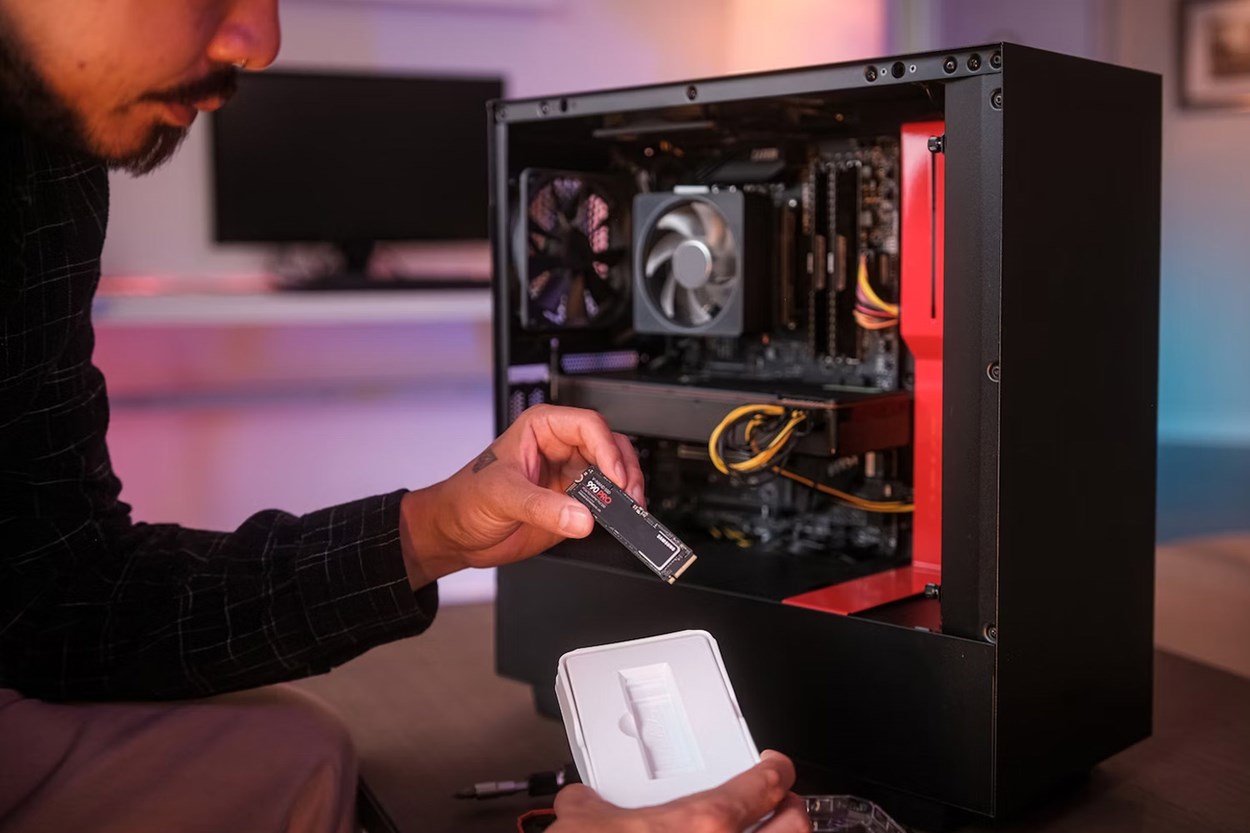
More or faster storage space: If Windows takes ages to boot, your games take a long time to load, or you’re constantly having to delete apps and games to make room for new ones, you need to upgrade your storage. Check your motherboard manual or the manufacturer’s website to find out what kind of storage drives your system supports. If it has space for a larger, or additional NVMe SSD, buy one of those – ideally 512GB or larger. Alternatively, if you only have SATA drive ports, buy a large SATA SSD – 1TB drives are very affordable.
There’s no reason to use a traditional spinning-disk hard drive for games or operating system installation. They’re not much cheaper than SSDs and are far, far slower. Only consider a hard drive for multi-terabyte drives that store masses of photos, music, or videos.
Run the latest AAA games: If your PC just can’t start some of the latest games, then there’s a lot you may need to upgrade. Check the minimum specifications for the game(s) you want to play and see whether you can upgrade your system to meet them. Depending on the game, you might need to add more RAM, or upgrade your graphics card. Either of those can just be dropped into most systems, but if you need to upgrade your processor, that can be a little more complicated. Depending on the generation of CPU you need, you may also need to upgrade your motherboard and memory, too.
When making any major component upgrades, like CPUs and GPUs, you also need to make sure your power supply has the wattage required to power them. If you’re unsure about this, get in touch with CCL directly and one of our component experts will walk you through what you need to upgrade.
Make games run better: If your frame rates are stutteringly low, you can’t turn on higher graphics settings, or you want to play more competitively, then you want a new graphics card. GPUs do most of the heavy lifting when it comes to games, and unless your processor is exceedingly out of date, a new and better graphics card is almost always going to deliver a bigger uplift in gaming performance; Especially if you play at higher resolutions.
If you already have a good graphics card, or you want to make the most of your new one, then you can also upgrade the CPU (and perhaps motherboard) and memory. Together, these components form the backbone of gaming performance. The latest processors from AMD and Intel can help boost frame rates to new heights, and they help avoid infrequent drops to particularly low frame rates which can make an otherwise smooth game experience appear to stutter, which is no good for immersion or competitive play.
Improve streaming or video editing performance: If you’re struggling to edit high resolution video, or your PC grinds to a halt when you try to game and stream at the same time, you probably need a more powerful processor. Compare the price and performance of upgrading to a better CPU on your existing motherboard, versus upgrading the motherboard and CPU at the same time to access newer generations of processor.
For streaming and video editing, higher core counts really do matter, with even the most high-end options with 16 or even 24 cores offering some performance advantage over processors with fewer cores.
It’s also important you have enough memory, with 32GB often recommended as the minimum for demanding streaming or video editing. If your footage takes a long time to import to your project, too, you might want to upgrade to a larger and faster SSD to store it all on.
Improve the cooling: If anything in your PC is running too hot, then improving the cooling will help bring it in line. The first step should be to give your PC a good clean to see if that helps, but if you want to go beyond that, then you’ll need to upgrade the cooling system in your computer.
If your CPU is overheating, look to replace the CPU cooler. If your graphics card is getting too hot, you can consider big and costly GPU cooler replacements, but that can require a big investment in money and time to do so. You may be better off simply upgrading your system cooling by adding more fans or reducing air turbulence so that your graphics card has better access to cooler air.
For the ultimate quiet cooling solution, consider advanced watercooling. It can mean a significant investment with all the fittings, pumps, radiators, and tufont-size: 14pxbing, but it looks amazing when finished and the performance is unbeatable. If you want any extra help getting started, get in touch with CCL and one of our PC building experts will walk you through upgrading to advanced system cooling.
Improve connectivity: Need more USB ports? Want faster access to the internet and your local network? Grab an add-in expansion card. There are all sorts of PCIexpress cards you can plug into your motherboard to improve your system’s connectivity. You can add as many USB-A and USB-C ports as you like, add support for 2.5 Gigabit Ethernet, or Wi-Fi 6E connectivity. You can even add Bluetooth support with impressive antennas for connecting all kinds of wireless accessories.
Alternatively, you could look to replace the motherboard as the latest models support many of these features as standard, but that’s a much bigger and costlier upgrade. You also need to make sure your CPU and memory are still compatible, as you may need to upgrade them at the same time if not.
Make the most of an already great PC: If your PC is powerful enough for all the tasks you set it, you can always upgrade it with improved peripherals. That’s the monitor, mouse, keyboard, and headset. A better display can make games, movies, and even just web browsing look better. The latest generation OLED monitors are simply gorgeous, no matter what you’re doing, and the higher refresh rate models of top gaming displays can make your games look far more smooth and play more responsively.
As for the other accessories, a mechanical keyboard is great for gaming and longer typing sessions, helping the keys to actuate faster and more accurately. Gaming mice offer better ergonomic support and more accurate sensors, which can make you a better player in high-speed action games. A more comfortable or high-end gaming headset can give you a much better sounding experience on your PC, whether you’re playing games, watching movies, or just listening to your favourite tracks. You can get wireless models which sound just as good and give you the freedom to get up and walk around without taking off your headset, too.
How to upgrade your PC
Once you’ve settled on the upgrades you want, you’ve ordered them, they’re there, ready to install: You actually have to upgrade your PC yourself. If you’ve not done it before, it’s easy to feel intimidated by all the slots and wires, and the distinct possibility that you could break something if you just dive in without knowing what you’re doing.
While that’s true, if you take due care, do a little reading before hand, there’s no reason you can’t upgrade anything in your computer. They’re designed to be easily upgradeable by just about anyone with enough time and patience.
Whatever you’re looking to upgrade in your computer, here’s a quick guide on each of the major components and how to install them yourself.
Before completing any of the following upgrades, make sure to turn off your computer and remove the power cable to prevent shocking yourself or damaging any components. Also ensure that you have plenty of space on a flat, non-conductive surface, like a desk – not a carpeted floor – and ideally, wear an anti-static wristband. Alternatively, you can ground yourself by periodically touching the PC case or power supply casing.
It’s also a good idea to back-up any important data you have, just in case something goes wrong during the upgrade. The last thing you want is to lose precious photos because you missed a step and shorted out your hard drive.
Note: Although we believe here at CCL that anyone can build a computer, you do so at your own risk. CCL and the author(s) of this article accept no responsibility for any damage caused to your computer or its components during any DIY builds or upgrades.

How to Upgrade your CPU
Before you begin, double check that your CPU is compatible with your motherboard and memory. If it isn’t, you’ll need to replace the CPU (or the motherboard and/or memory) before proceeding. Trying to install a CPU that isn’t compatible could cause a lot of problems, so be sure not to skip this step.
Note: If you are installing a CPU from a more-recent generation, be sure to upgrade your motherboard’s BIOS before proceeding to ensure compatibility. This is especially important with AMD’s 3D V-Cache CPUs which may not work correctly, or at all, if you don’t update the BIOS first.
The first part of upgrading a CPU, is removing the old one, but before you can do that, you need to remove the CPU cooler. Use a screwdriver to remove the screws and any retaining plates from the cooler, and then gently pull it away from the CPU. If it feels a little stuck, twist it gently from side to side to loosen it first, and check to make sure everything is unscrewed. It shouldn’t take too much force to remove.
Once you’ve removed the cooler, use some isopropyl alcohol and a lint-free cloth to remove the thermal paste from the cooler, then do the same for the old CPU. To remove the old processor, lift the retaining arm from the socket, lift the retaining bracket away, and then – while holding it from the sides – carefully remove the CPU and place it somewhere safe.
Take the new CPU and line it up correctly with the socket. There may be a gold triangle in one corner to help orientate it, but with the small notches in the CPU, there should only be one way it can be neatly installed. If it doesn’t slot straight into place, don’t force it. Check the orientation and if in doubt, give it a little wiggle side to side to see if it drops into place.
Push the locking plate back down on top of the CPU and then press down the retaining arm. This can take a little more force, but it shouldn’t be hard. If in doubt, check the CPU is in the socket correctly before pressing down to make sure you don’t damage anything.
Use a tube of heatpaste to add a pea-sized drop of thermal interface material in the middle of the CPU, then install the CPU cooler as per its instructions.
When you boot the system up again, you may need to reset the BIOS, or adjust Bitlocker settings for security purposes. Follow the on-screen instructions with care and you shouldn’t run into any issues.
How to upgrade your CPU cooler
Upgrading your CPU cooler is much the same as upgrading your CPU – just with fewer steps. Use a screwdriver or other implement to remove the old cooler. When you’ve unscrewed it, if it doesn’t come away cleanly, give it a little nudge left and right or twist it to loosen the old heatpaste underneath, before giving it another pull.
If you’re not certain, double check all the connectors have been detached as you don’t want to rip your CPU out with an overzealous cooler removal.
Once the old cooler is off, use a lint-free cloth and isopropyl alcohol to remove the old heatpaste from the CPU – and the old cooler if you plan to store it.
To install the new CPU cooler, follow the instructions you received in the box. Every CPU cooler is different, so there’s no way we could provide instructions for every type of cooler. Some require removing or replacing the CPU backplate on the other side of the motherboard, so be prepared to open up the other side of your PC case to do it.
How to upgrade your motherboard
Upgrading the motherboard is one of the biggest upgrade jobs you can complete, as it requires basically removing and replacing everything in your PC to do so. It also involves a lot of screws and cables, so if you can, have somewhere you can put them where they can be labelled or easily identified to make installing the new motherboard easier.
First, remove the graphics card and any other add-in PCIExpress cards by unscrewing them from the PCI brackets, and unplugging any cables still plugged into them on their back panel. Be sure to push down any locking pins at the front-end of the PCIExpress slots to release the cards before trying to remove them or you risk damaging them and the board.
Next, remove the memory by pushing down their retaining pins and pulling out the sticks one by one.
Unplug all power cables, SATA cables, fan cables, and front-panel cables from the motherboard by pressing down on their retaining clips and pulling them free. Push them to the side where they won’t get in the way, but you’ll remember their location, as that will save you time when plugging them back in to the new board.
If you have any NVMe SSDs installed on the motherboard, remove those now using a screwdriver. Replace any removed heatsinks or heatspreaders afterwards so that that the motherboard is in as-complete condition as it can be.
Remove the CPU and CPU cooler as per the instructions in the previous section and place them to one side for installing into the new motherboard.
Finally, unscrew all of the motherboard screws. If any of them seem to get stuck in the board, they may have pulled the motherboard spacers free from their mountings. Once you remove the motherboard, you can use a screwdriver and a pair of pliers to remove these.
Then lift the motherboard out and put it away either in its original box, or somewhere that it won’t get in the way of your new motherboard and its components.
If necessary, install the new motherboard’s rear I/O panel bracket – though most modern boards incorporate these into the board itself. Take the new motherboard and look at its screw layout. If they line up with the existing motherboard spacers in your case, then place it into the case and line it up with the spacers. If it doesn’t line up nicely, you may have to install additional spacers. You should have received some spare spacers with the case.
Screw in all of the motherboard screws with only a few turns each to hold them in place. Once all are in, then go around and tighten them all to lock the motherboard in place.
Install the CPU and CPU cooler as per the instructions in the previous section. Then install any NVMe SSDs, and the memory, as per the instructions in the sections below.
Connect all the motherboard power cables, including the 20+4 pin and CPU power (that can be a four, eight, or dual eight pin connector at the top of the motherboard), followed by any front panel connectors, and any relevant SATA cables. Then plug in any system fans you want controlled by the motherboard.
Install the graphics card and any other add-in cards as per the sections below, and screw them in to the PCI brackets on the back of the case to lock them in place.
Switch on the power supply and boot up the PC to make sure everything works correctly. You may have to reinstall the operating system with a new motherboard, but at the very least you’ll need to install new drivers. Download them from the manufacturer’s website or use the bundled installation media to update your PC for your new motherboard.
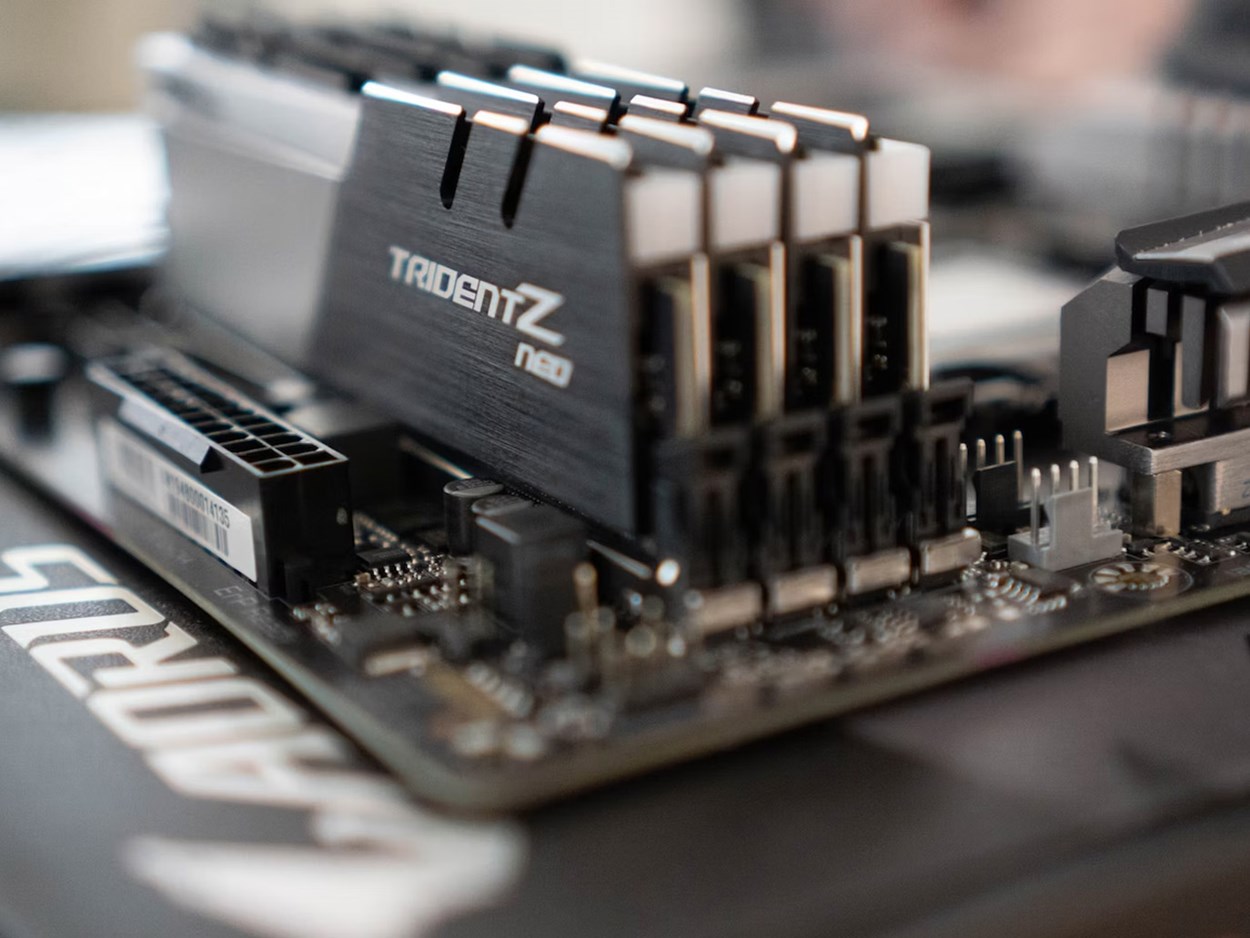
How to Upgrade your RAM
Memory is one of the most straightforward upgrades, as sometimes you don’t even need to remove the old sticks. Before installing anything, though, check your motherboard manual to confirm which are the best slots to install your RAM in to offer the best performance and stability.
If you’re simply adding capacity with some additional sticks, then you only need to take a couple of steps. Open the spare memory slots by pushing back the retention brackets at each end. Then check the orientation of your new memory by comparing the notch in its contacts to the one in the socket so that it lines up correctly. It can only be installed one way, so reverse the stick if it it doesn’t line up, then push it gently at one end then the other until it clicks.
The retention brackets will likely spring into place, but it not, click them in yourself to secure the stick. Then repeat with another stick if installing more than one memory module.
With RAM, remember you can maximize performance by ensuring that all of your memory is the same, so it’s often better to remove the old RAM first. To do so, simply push down on the retaining brackets at each end of the stick to unlock it. Then grip the RAM stick on each side and pull it upwards to remove it from the slot. Then replace it with the new memory as per the instructions above.
How to upgrade your graphics card
Graphics cards upgrades are relatively straight forward, but they are rather large, and can be rather heavy if they have a big cooler, so installation can be a little tricky if your case is on the more compact side. Still, for most graphics cards in most cases, it’s as simple as unplugging the old one and plugging in the new one.
Detach any PCIExpress power cables from the existing graphics card, and unscrew it from the PCI bracket at the back of the case. Then press the locking pin at the front of the PCIExpress slot to unlock the graphics card. While keeping it depressed, pull the GPU free from the PCIE port.
To install the new graphics card, simply line it up with the PCIExpress x16 slot – if you have more than one, use the top one closest to the CPU – then gently, but firmly push it into the slot. You should hear a click when the locking pin engages. If it doesn’t, lift the GPU back up and check alignment before trying again.
Once it’s in place, screw it in to the PCI bracket at the rear of the case to give it further support. If your GPU looks like it’s sagging lightly in its slot once installed, you can get a graphics card support bracket to hold it up. Alternatively, simply place anything non-conductive underneath the GPU to take the weight – Lego bricks work well.
Once it’s all locked in place, plug the PCIExpress power cables into it. If it’s one of Nvidia’s RTX 3000 or RTX 4000 GPUs, you may need to use the included adapter to connect to the new PCIE power connector on those cards.
Note: If you have to plug in multiple six or eight pin connectors into an adapter, try to use separate PCIExpress cables, rather than the additional headers on each cable to spread the power load across as many cables as possible for improved stability.
How to upgrade your power supply
Upgrading your power supply is a great way to improve your system’s efficiency and open up the possibility of using even more powerful hardware. Installing a new one is relatively straight forward, but you need to make sure to use the right cables and that you plug them all in, because missing even one can mean your PC won’t boot up at all.
To take out the old power supply, unplug all the motherboard power connectors, including the 20+4 pin and any CPU power connectors at the top of the board. Unplug any SATA drives, and unplug the PCIExpress power cables from your graphics card. If you have any fans or other accessories that are wired into SATA or 4-pin Molex power connectors, unplug those too, and any others we might have forgotten.
Unscrew the screws on the back of the case that lock the power supply in place, then – depending on your case – pull the PSU out the back of the case, or remove it from the side.
To install the new power supply, slide it into place first so that you know where the cables will run. Make sure that the PSU is facing the right way up – this typically means placing the fan on the bottom so it can draw cold air in from the underside of the case. Then carefully plug the power cables in to the motherboard and your various components one by one until everything has power. Push firmly into the sockets, but not so hard that you risk cracking the motherboard. You should hear a click when the locking mechanisms lock into place. If you can, run the cables behind the motherboard, or through cable tidies so that the wiring is neat and doesn’t disturb system airflow too much.
Once everything is plugged in, screw the power supply into the rear of the case to hold it in place.
How to upgrade your case
Upgrading your case is a monster of a job that involves removing absolutely everything from the original and then moving it over to the new one piece by piece. However, you can save yourself a lot of time by leaving some components attached to the motherboard.
To change case, you’ll need to remove the motherboard from its existing case using the guide for replacing the motherboard above. I’d recommend you remove the graphics card too, since it can be heavy and unwieldy. However, if you’re careful, you can avoid removing the CPU, CPU cooler, and memory, so that you don’t have to reinstall those in the new case. Just be careful during the transition and don’t hold the motherboard up by the CPU cooler, since that could put too much pulling pressure on the processor.
Once you’ve moved the motherboard, CPU, CPU cooler, and memory into the new case, plug the graphics card back in, and connect any front panel connectors to the motherboard. Then unplug the power supply and any storage drives from the original case, then move them over to the new one and plug them into the motherboard and other components as necessary.
Be sure that you connect the front-panel connectors carefully, as they can have a different layout than other cases and it’s easy to find your power button not working in a new case. You may also have new system fans which need connecting to the motherboard or your fan controller.
How to upgrade your system cooling
Adding new or better fans is a great way to improve the airflow in your case. That can help your components run cooler and quieter, improving their performance, longevity, and helping to reduce noise levels by making it so that the existing fans don’t have to work so hard. You can also replace existing fans with quieter, higher-quality fans to further improve noise levels and temperatures.
To remove existing fans, unplug them from the three or four pin motherboard fan headers, and unscrew the fan from the chassis. Be careful if they have any metal fan grills on them, that they don’t fall and hit anything in the case when they come away.
To install the new fan, place it against the fan mounting position at the front, rear, top, bottom, or side of a case. Make sure to orient the fan correctly. The side that will “blow” will have a cross bracket across the fan, while the side that’s more open will pull the air in. If you’re installing an exhaust fan, make sure to mount it so that the air blows out, and if you’re mounting a fan as an intake, make sure it’s facing the right way to pull cool air in.
Once oriented correctly, screw the fan(s) in using the supplied screws. Every fan has different mounting systems with different sized screws – and some use anti-vibration silicon “screws” to further reduce vibrations and noise levels. You should receive the ones you need with the fan.
Once they’re installed, plug them into your motherboard or fan controller to power them and give your system the ability to adjust fan speeds based on your chosen fan curves. If plugging directly into the motherboard, use your manual or labels on the motherboard to find the system fan plugs, as those are configured slightly differently to the CPU fan port.
Conclusion
We could write forever with ever more tips about installing different components, but I think we’ve covered the broad basis with this already extensive article. With this information you should have everything you need to know when, how, and why to upgrade your PC – and whether it might just be worth it to buy a pre-built PC instead.
If you need any more information, please don’t hesitate to give CCL a call. Our PC component experts are always on hand to give you the information you need to make the most informed purchase.